Monday, December 30, 2013

Fifth grade self portrait sculptures

A few years ago a parent gave me 2 cases of jewelry boxes. They have sat for years until I got an idea from another teacher, Lois, in our district. 
We turned the boxes into a sort of self portrait shrine. I made a Power Point showing and discussing types of self portrait sculptures large and small, varieties of materials, and if it even needs to look like ourselves.
 I printed out instructions and also drew instructions for differentiation of students.  Model Magic sculpted for the heads and hands. Watercolor used to paint the box, inside and out to show their personalities.. Found items of their choosing and a school photo inside the box. Chenille stem arms, wine cork legs. These will be  saved for their end of the year celebrations, and the art show of course.

Silhouetted tree on a blue value sky, Grade Four

I  see a lot of variations of these on line. So I know it is not super original, but my fourth graders enjoy the starkness of it.  I t neat to see  how each student mixes white with their blue to create the values. This year I used a cheap blue that is too transparent. Yuk. Go expensive next year and buy quality paints. This is also a fundraiser project.

Cool Ocean Animal Prints with Third Grade


I like to do a Styrofoam printing lesson in third grade.  The children have fun learning to draw a variety of ocean animals in their sketch books first. They pick their favorite for their foam print. I used precut 4x6" pieces. They draw on 4x6" copy paper first, then tape the paper onto the foam and trace over their lines to engrave the foam.  Lift the paper and engrave with pencil again for deep lines.We also painted 2 wet on wet backgrounds using cool watercolors on 6x8" tag. Then the printing day came. I like to have them print twice and choose their best for mounting at the next class. We discuss having presentation ready artwork. Our best print is glue-sticked onto 8x10" black construction paper. The borders are drawn  with white oil pastel. Students use ocean themes to create a pattern.

Second Grade Warm,Cool Peacocks with crayon Resist

I  have been doing this project for 9 years now with second grade. We use it with Art to Remember, our fundraiser program. It is a parent pleaser. I think I learned it originally at a convention here in Colorado. I do a Monart  lesson to show how to draw it. Great for discussion on angle lines, curved lines and diagonal lines. We crayon warm colors for "sparkle" and paint over with cool watercolors.

First Grade Flower Collograph Print


This is a Patty Palmer lesson from Deep Space Sparkle. We used foam shapes glued onto mat board. The next week we painted liquid tempera onto flower. Print, wipe, repeat, 3 times. The 3rd week we used Qtips and liquid tempera to embellish with dots.
A lot of kids wanted to take home their printing plate.

Kinder Self portrait, Secondary color mixing, Decorated name.

These took many weeks but were really cute. The t-shirt had painters tape on it and kinders mixed 2 primary colors in each square to make a secondary color, using liquid watercolors, and sprinkling salt on for a tie dye look.

More Veterans Day artwork.

 Silver Liberty Bells, by Second graders
Soldiers by Third graders.

First Grade Primary Colored Career Minions

I love the Despicable movies and the little minions. I saw some minion ideas on Pinterest and decided to have a go at my own version. First graders learned about different types of careers and the "props, or tools that go with them.


 The we drew our minions on 9x12" tag. And went over our lines with sharpie.

 I had an inflatable minion-pal that came with a movie DVD purchase. He came out for daily visits with first grade. We then painted our  minions with primary colors of puck tempera. We used crayons for the details in the hands and pocket. There were cut out and glued onto black construction paper. I will post some finished minions soon.


Fifth Grade Castles

 This is a Patty Palmer, Deep Space Sparkle project. My fifth graders are just starting their castle drawings, moats, back grounds, adding sharpie and using colored pencil to shade. It is a good math tie-in for solid geometry making cones and cylinders. They love the 3-D look and are doing a great job. thank you Patty for this great project!


Neutral Colored Glamster Gerbils for Kindergarten

I will post this cute book I bought at our school book fair called,"Glamsters". It is about 2 sister gerbils who wish to be "adopted" or bought at the per store. Harriet tries to fix herself up and look glamorous so she will be noticed. We will make big hamsters and create a funny hat for our hamster. I chose this book and created the lesson to teach kinders about Neutral colors. I have a little song we sing as we learn about neutral colors, and look at lots of animal colors. I made it up to piggyback on the tune of Twinkle Twinkle. It goes:
 Black ,White Brown, Tan and Gray,
Neutral Colors show everyday.
Gray for an elephant ( make a trunk out of arm and swing by nose),
Brown for a Bear( make hands into claws and growl),
 Neutral Colors are everywhere.
 Black ,White, Brown,Tan ,and Gray,
 Neutral Colors show everyday.

The first day we read the book, sing about neutral colors, and practice draw gerbils selecting  neutral colors from the crayon box. I have kinders for 45 minutes at 2:00. They are so tied by then that I have to break down classes into little increments. they then enjoy a relaxing "free draw" time, if they finish early. More on early finishers per grade level on another post.


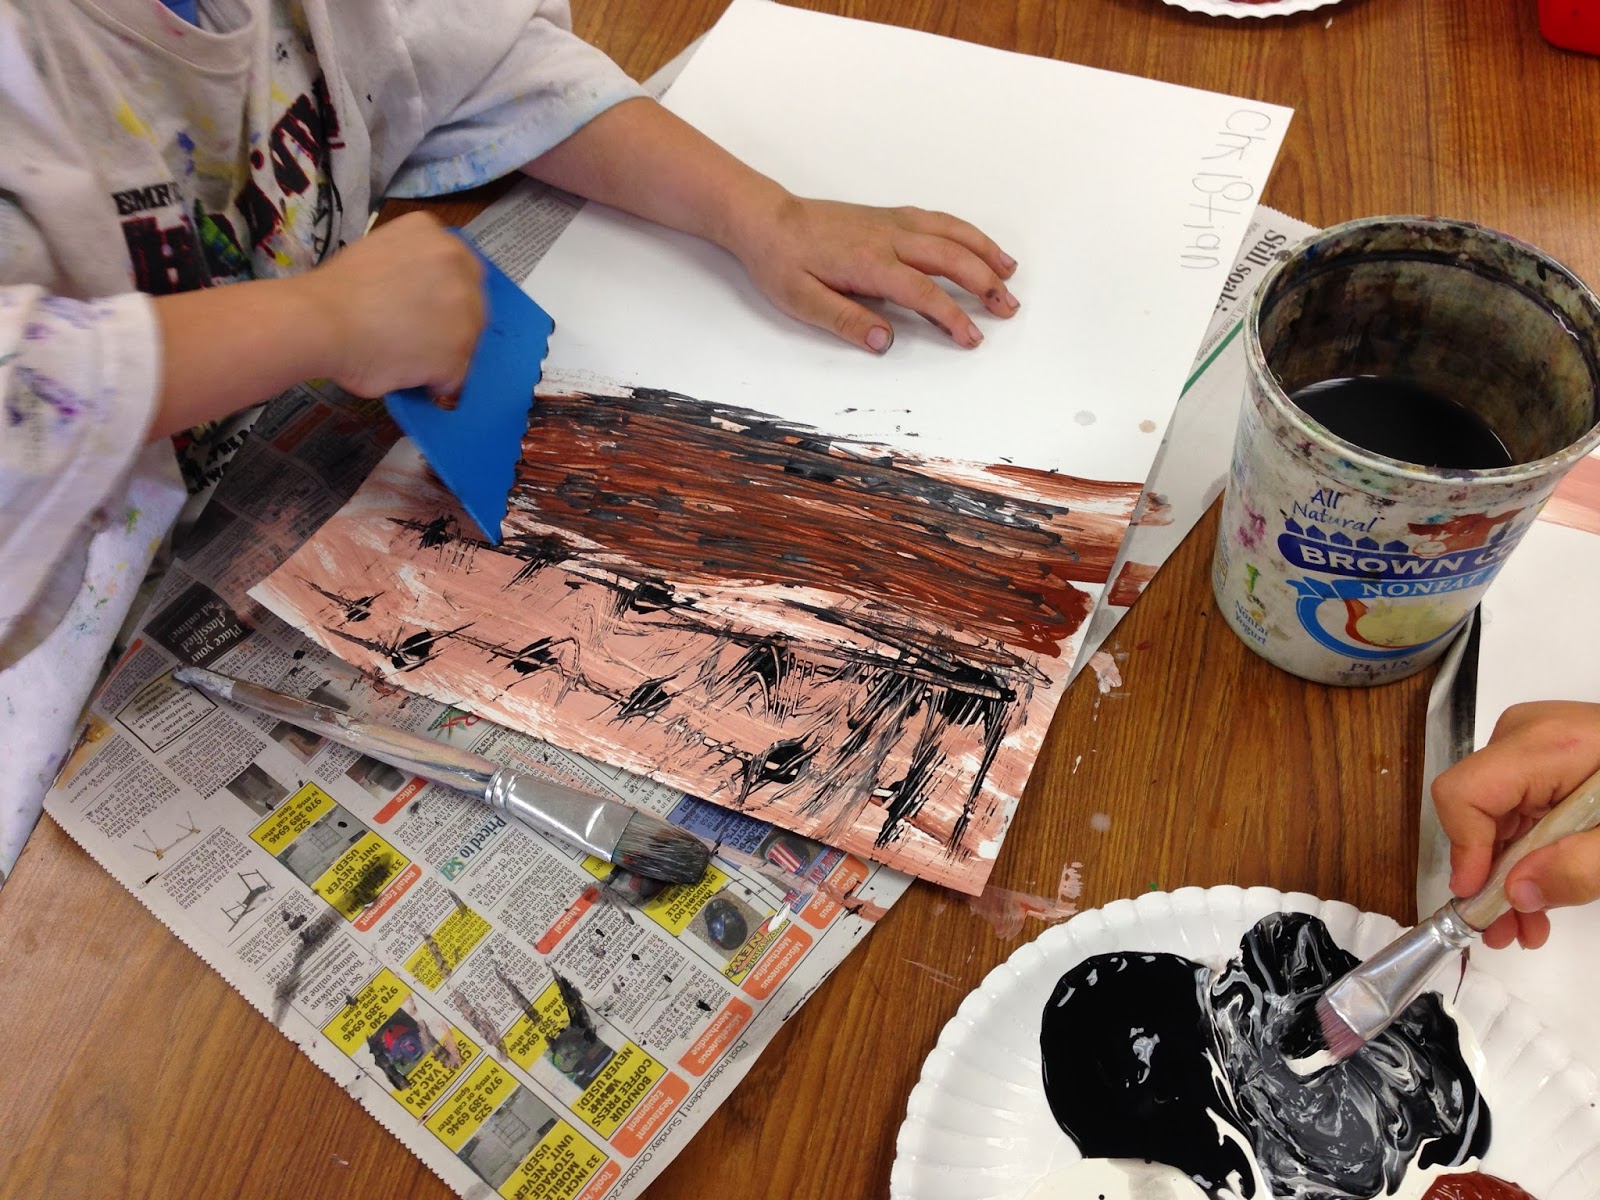
The next class I make paper plate pallets of liquid tempera. There are 5 puddles: black, white,brown, white with a drop of brown for tan, white with a drop of black for gray. I like to demonstrate using my document camera and the big  pulldown screen. The kinders love to watch the "art show live on T.V."! I show how to mix the puddle to make tan and the puddle to make gray, stressing not to mix the whole plate!!! Then I paint thickly on 12x18" light weight tag, I paint a 3" strip of a color and dot or strip with another color, then use texture combs to create fun lines in the paint. The trick is thick paint and quick painting on their part.  Cover the entire paper.  These will dry for  the next class.
More after Christmas break.

Second Grade Painted Paper Woven Fish

I try to do a paper weaving project with second grade every year. this year I am using an idea from Deep Space Sparkle. First I showed a brief Power Point about weaving terms, types of looms, and weaving around the world. We then  used liquid tempera in 2 analogous colors and texture combs to create the weft paper. The next week I did a step by step instruction on how to fold and cut the loom. Take a 9x12  piece of matching construction paper a fold it into a hot dog fold.  Use a 1 inch wide ruler to mark a line across the open end of the hotdog bun, lining the ruler with the open end. This is a hard concept for some. so I walk around to make sure no lines were drawn on the fold.
Then draw "piano keys" down from the previous pencil line to the fold. Line the ruler up with the previously drawn line each time until reaching the end. The result looks like a little piano, which the kids play as I double check all. Then I show how to cut from the fold up to the initial long line at the open edge. The space from that line to the edge is the "No Cutting Line", so kids don't cut all the way up. ( This is also how you make  paper lanterns.) Use the ruler to draw lines along the long side the painted paper and cut strips.

This  cutting takes one entire class period. The next class I demonstrate weaving. If you have taught weaving with kids, you know this is a cognitive skill. Some will pick it up quickly and others will struggle. I put up this poster and we repeat this mantra several times. Start the weaving on top of the  warp of the loom, going over under  one  strip to the end.  The strips will hang out. The next weft strip has to begin under the warp loom strip.  And so on starting opposite the last woven strip. Keep pushing strips down snug as you weave. If time permits, or the next class, paint glue on the back of the weaving and adhere a manilla drawing paper to the entire back.
When fish are dry, demonstrate drawing a large fish with open mouth on back of weaving. Cut out. This takes work from their little hand muscles as the paper is now 3 thick. Save the scraps.

These are then embellished with tails, dorsal fins, pectoral fins and layers of shapes from scraps.
 I give them white pieces for teeth and eye balls. They loved their sharks, and piranas,  swordfish, and cutie fish with bows!


First Grade Animal Crackers

First Graders enjoyed the book, " The Gingerbread Girl Goes Animal Crackers"
by Lisa Campbell Ernst.
It is a fun play on the Gingerbread Boy book. They loved choral reading along as the crackers run wild across the farm.
I then demonstrated drawing their favorite animals on the white board. The Children sat down and drew " fatty"  animal crackers on shades of brown and tan construction paper. These were drawn over with sharpie, keeping the cookies simple.  For the next step we chose chalk in browns and tans. Lying these on their side, we put down color around the inner edge of the cracker animal. Finger smearing helped blend the chalk so it didn't look like a stripe.  We then cut these out.The cookies look lightly toasted, and yummy!


After Christmas break we will begin backgrounds where our crackers are running. Look back in a week or two.